27 July 2017
By portermathewsblog
Image Source: Inspired by Charm
This past weekend, my husband and I moved from the 94-year-old home we’ve been renting in the Berkeley Hills to a 58-year-old home around the corner. I have always had a soft spot for old homes — the architecture, the charm, the doorknobs! — but they definitely come with their quirks. Love ’em or hate ’em — if you’re living in an old house, you know there are some issues to contend with. Read on to find a list of 15 (relatively) quick fixes to make your old home feel new again.
Paint the Cabinets
Image Source: A Beautiful Mess
This is a big project, I won’t lie. I painted my cabinets once despite being spectacularly DIY averse. But that monotonous oak was killing me, so I persevered. And it is so worth it! A few cans of paint (and many hours of your life) will completely transform your kitchen — in fact, your whole home.
Paint a Tile Backsplash
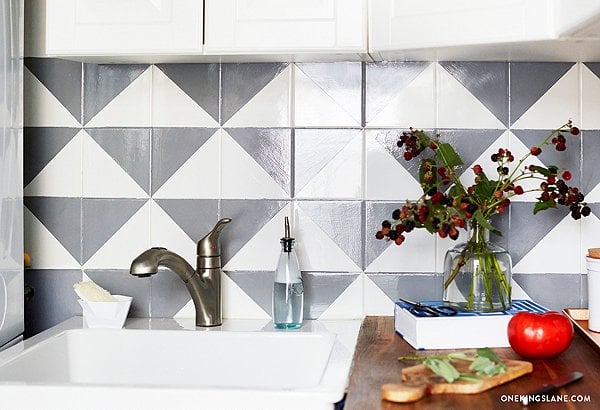
Image Source: One Kings Lane
Boring white tile backsplash? No matter — geometric patterns are hot this year, and you can make your own in a weekend!
Give Your Pantry a Makeover
Image Source: Polished Habitat
What with layers of paint and warping wood, old house pantries can definitely be lacking, so give yours a makeover! Make it the happiest place in the house.
Paint a Brick Fireplace
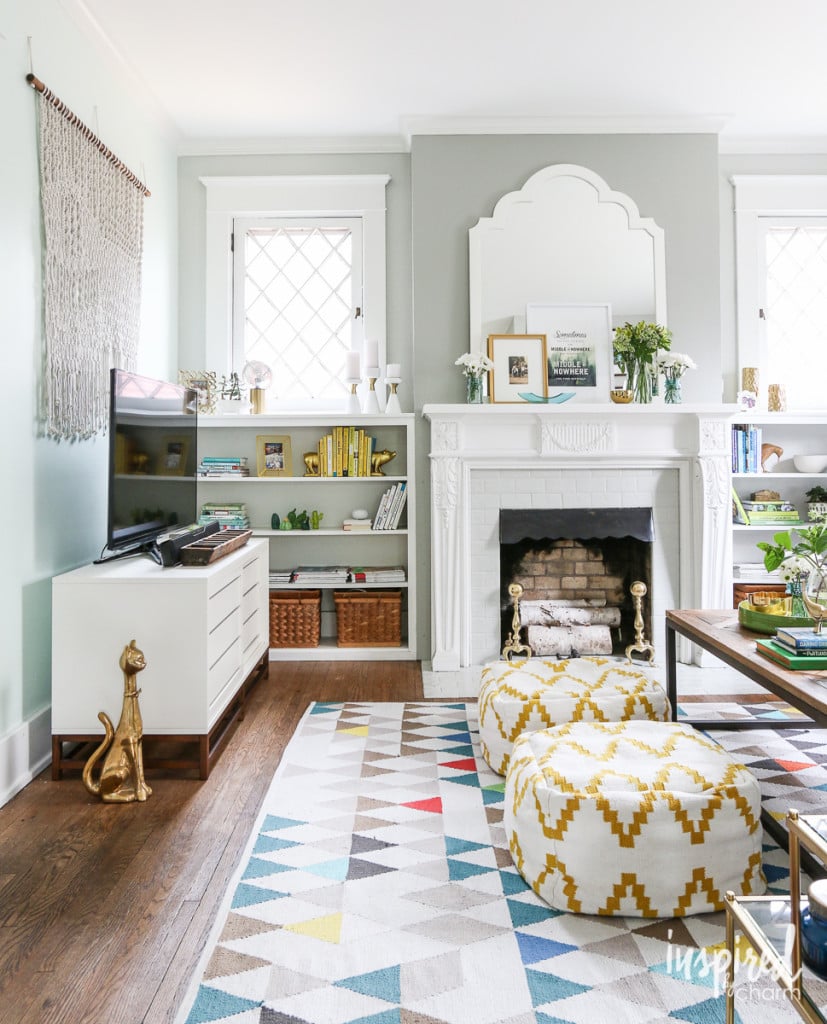
Image Source: Inspired by Charm
If your brick surround is an eyesore, not to worry — just paint it.
Cover a Popcorn Ceiling With Wood Planks
 Image Source: Domino
Is this a major project? Yes. But then everything related to the ubiquitous popcorn ceiling seems to be. This is a doable DIY if you plan ahead. And the outcome is gorgeous!
Replace Ugly Doorknobs With Vintage Versions
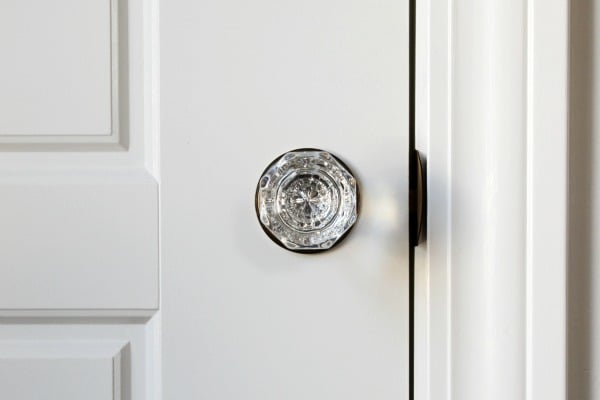
Image Source: House Tweaking
This is an easy fix, but buying reproduction doorknobs can get pricey fast. To keep the budget down, shop local salvage yards or source an eclectic collection on Etsy.
Paint Kitchen and Bath Hardware
Image Source: Brittany Makes
Old kitchen and bath hardware can look pretty tired, and it’s no wonder, what with all the heavy lifting they do for us every day. But with a little sanding, primer, and paint, you can give them a new life. Check out this tutorial on how to spray-paint hardware for some inspiration!
Paint the Floor
Image Source: Little Green Notebook
Check out this great tutorial on how to paint a tile floor. Let your creativity run free with multiple colours and a repeating pattern.
Paint a Wood Fireplace
Image Source: The Makerista
Does your old house have a room (or rooms) full of wood siding? Can there be too much of a good thing? Sometimes a focal point is all that’s needed to draw the eye.
Dress Up a Cinder Block Wall With Chalk Paint
Image Source: Sarah Hearts
Are you cursed with a dated cinder block patio wall? Do this now! Cutest solution ever, although definitely opt for paint over chalk to make sure your hard work lasts and lasts.
Paint Your Trim
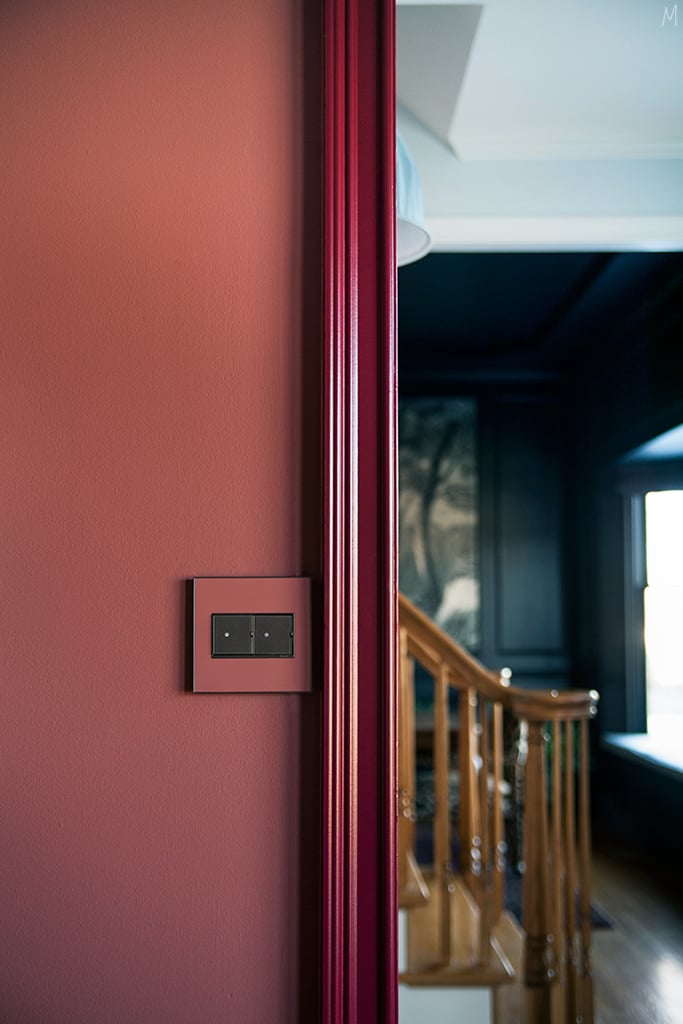 Image Source: The Makerista
Old homes often have intricate architectural details — show them off by painting them a dramatic contrasting colour.
Container Garden in Place of Landscaping
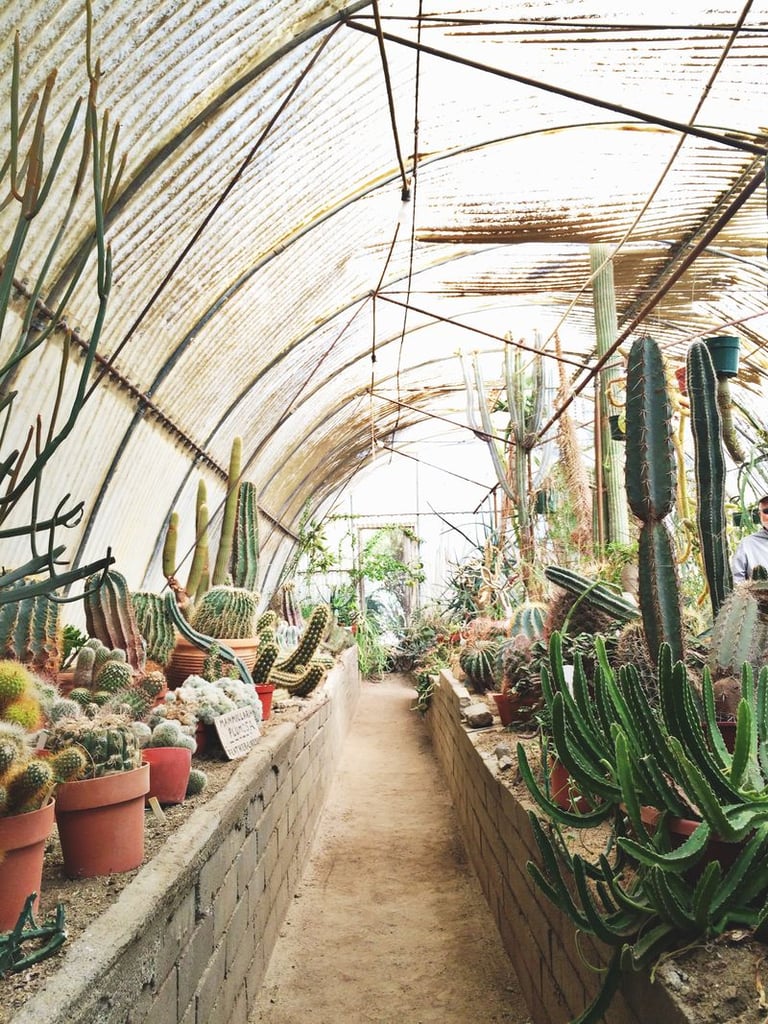 Image Source: A Beautiful Mess
If your landscaping looks as old as your house but new landscaping is not in the budget, try a container garden instead. Add a few at a time (just remember to water them from time to time), and soon your garden will be looking cheerful.
Spray-Paint ’80s Brass Light Fixtures
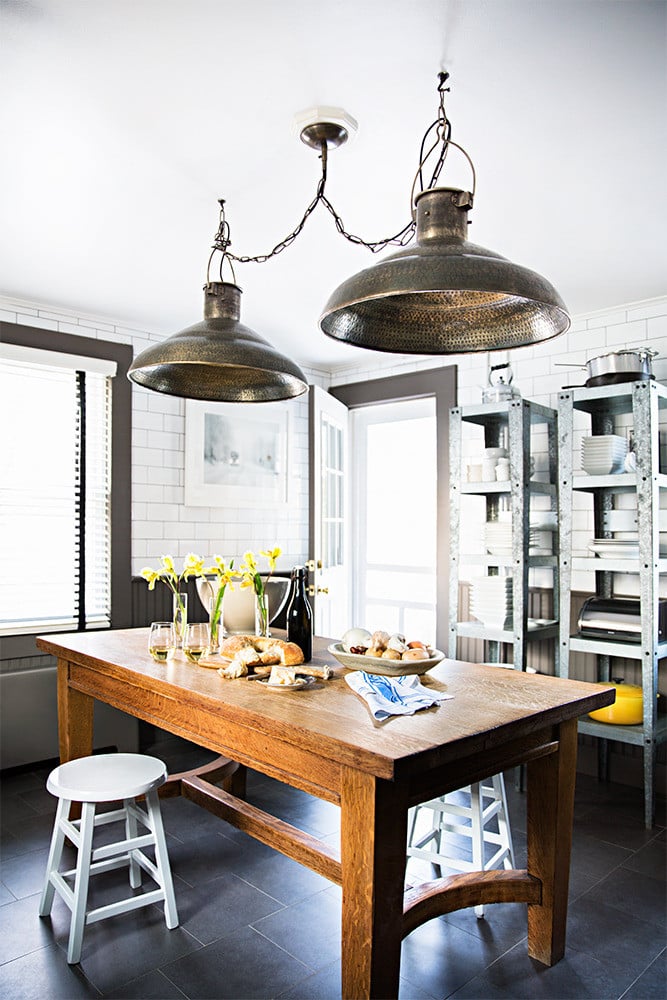 Image Source: Brittany Ambridge for Domino
Sometimes a can of spray paint and an afternoon is all it takes to update an old light fixture.
Tile Over Your Countertop
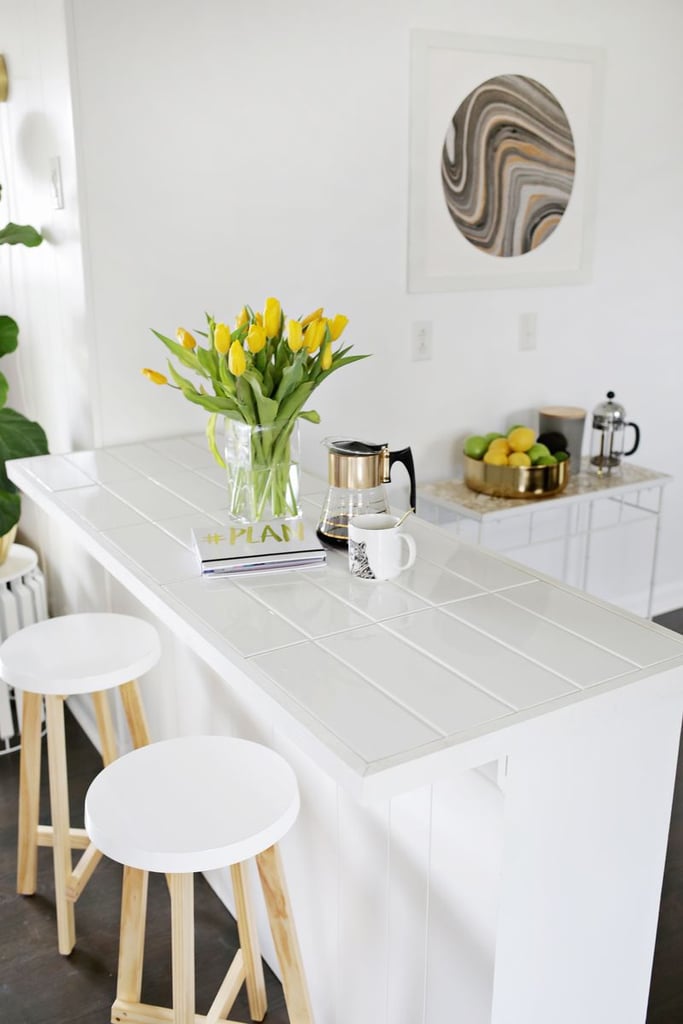 Image Source: A Beautiful Mess
Dated tile? Yucky grout? Tile over it! Click here for the DIY.
Paint Your Stone Patio Tiles With Pops of Colour
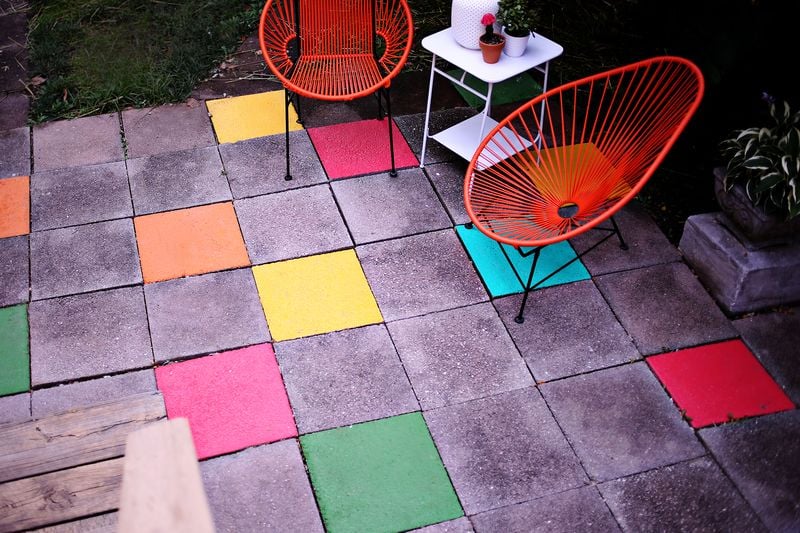 Image Source: A Beautiful Mess
Leave it to the bloggers at A Beautiful Mess to make even an ugly concrete patio look adorable.
Comments (0)
25 July 2017
By portermathewsblog
via reiwa.com.au
 Perth sellers struggling to sell should look at going to auction, with reiwa.com data revealing it was 42 days faster to sell by auction in the metropolitan area than by private treaty in the three months to June.
REIWA President Hayden Groves said while auctions represented a small component of the Perth property market, those sellers who did choose to list their property for auction were experiencing significantly faster selling times.
“On average, it takes around 70 days to sell by private treaty in Perth, but sellers who go to auction are achieving sales in as quickly as 28 days,” Mr Groves said.
“In this market, when there is plenty of competition between sellers to secure a buyer, standing out from the crowd is paramount. Selling at auction has plenty of benefits for the vendor, with a short but high profile marketing campaign bringing serious buyers to the forefront quickly.
“You also have the security of knowing if your home doesn’t sell at the fall of the hammer, you can continue to negotiate a purchase price with those interested buyers after the auction using the more familiar private treaty method.”
reiwa.com data shows auction sales in Perth peaked in December 2016, lifting to 2.31 per cent of total sales activity in the metro area for that month, before returning to just below two per cent by March 2017.
“Auctions are still relatively unfamiliar to West Australians, but you only have to look to the East Coast, particularly Sydney and Melbourne, to see how successful this method of selling can be. I encourage WA sellers to speak with their real estate agents about whether auctions are the right fit for them,” Mr Groves said.
Here at Porter Matthews Metro we have a well thought out Auction process and success rate, if you have queries as to how this method might suit you, please give us a call on 9475 9622 or email us at mail@pmmetro.com.au
Comments (0)
21 July 2017
By portermathewsblog
 Image Source: POPSUGAR Photography / Lisette Mejia
There are many steps on the road to preparing for baby, but one of the most fun – and certainly most creative – steps is decorating the nursery. For my baby boy, I set out to transform my home office into a welcoming nursery that was at once personal, sophisticated, and wonderfully whimsical; more than just looking beautiful, however, it had to accommodate the essential nursery functions – and all without breaking the bank. I had my work cut out for me!
For some professional guidance, I turned to the experts at Laurel & Wolf, an online interior design marketplace that, for a reasonable, one-time flat fee, guided me to a top-notch designer with whom I created a custom room plan. Laurel & Wolf allowed me to try out the service at no charge for this project.
The design process was simple; after creating a detailed room profile, multiple designers submitted initial project proposals. I fell in love with the eclectic style of Pamela R McIntyre of The Curated Life. I selected her as my designer, and we got to work, exchanging design ideas and products over Laurel & Wolf’s online platform. The final design she gave me included a style board, detailed floor plan, and shopping list.
Check out pictures of the resulting nursery below, and read my 13 tips for creating a truly unique space for your little one.
Hang Personal Art
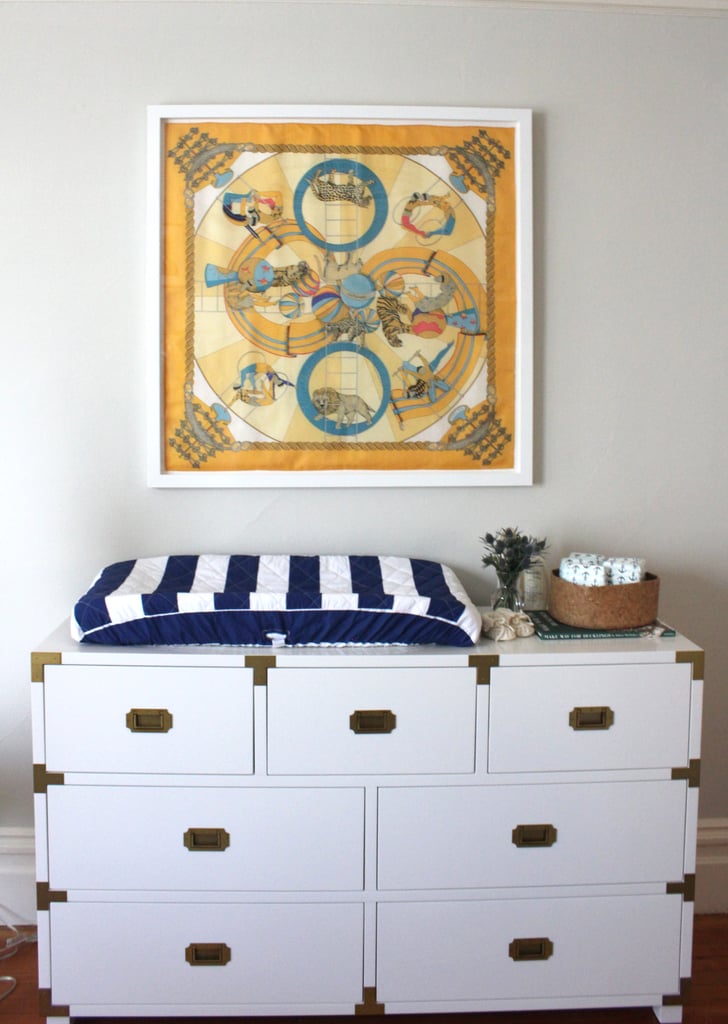 Image Source: POPSUGAR Photography / Lisette Mejia
Decorating with art and decor that are meaningful to you and your partner is a simple way to infuse your family’s personality into the nursery. I’ve long collected silk scarves, and I wanted to share their style and beauty with my son. I found a circus print by one of my favourite designers and had it framed to hang above his changing station.
Add Simple DIYs
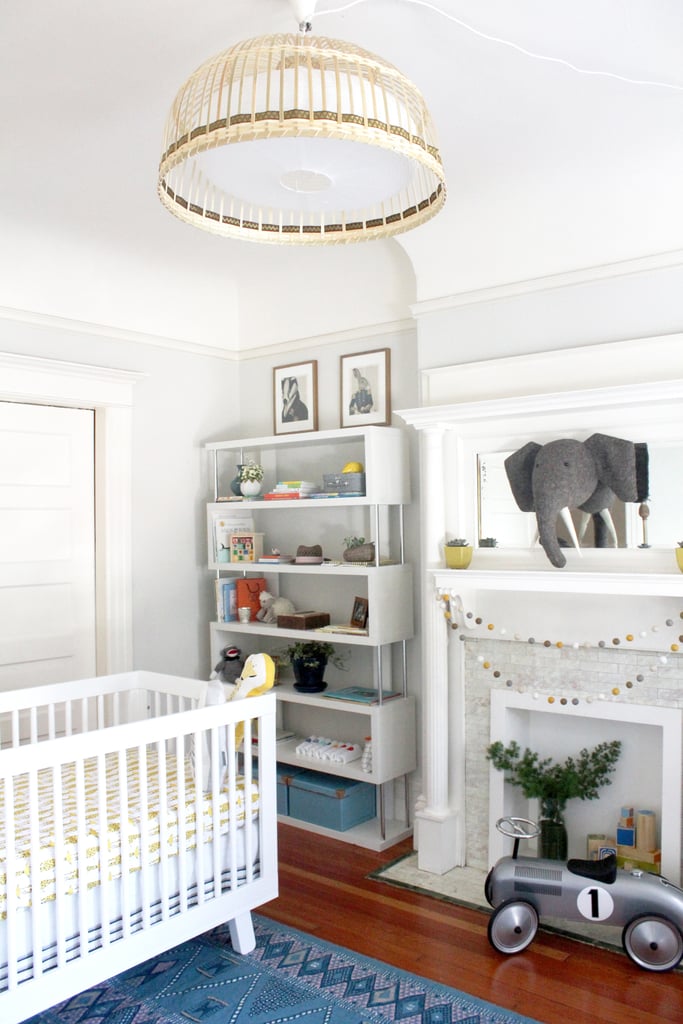 Image Source: POPSUGAR Photography / Lisette Mejia
When I couldn’t find the lighting I wanted within my budget, I began to think of ways to create it myself. Not wanting to get into electrical nitty gritty, I layered two super affordable Ikea hanging lighting fixtures — a paper lantern to softly diffuse light covered with a natural wood pendant. To make it extra unique, I wove a vintage French ribbon through the wood slats. Sometimes the simplest style is not only easier and cheaper, but it looks better too.
Blend Children’s and Adults’ Decor
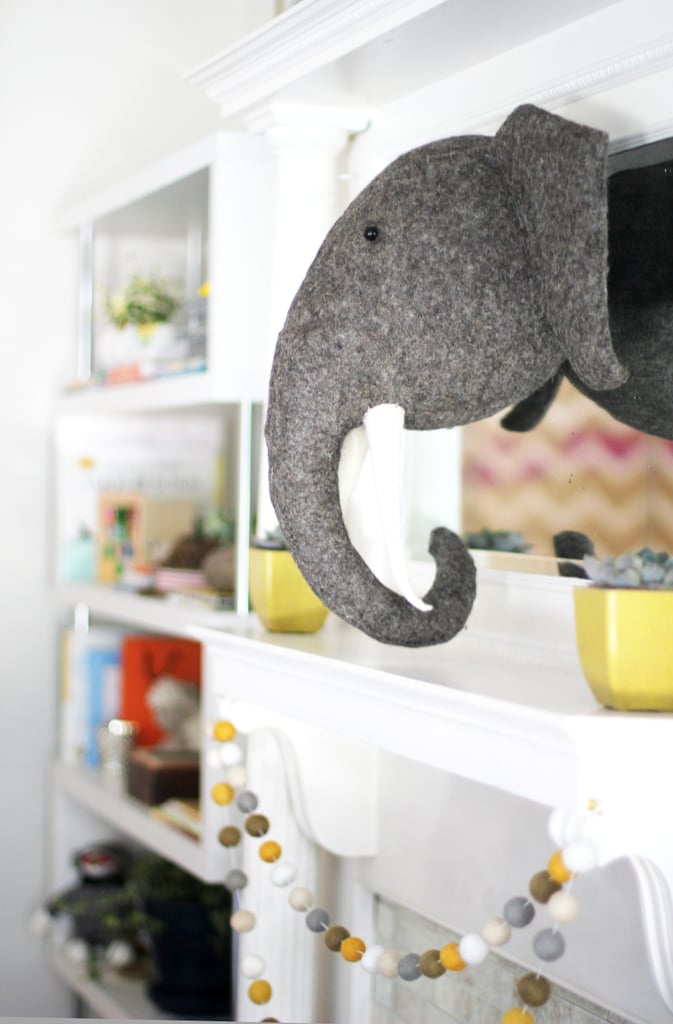 Image Source: POPSUGAR Photography / Lisette Mejia
I tried to balance whimsical and sophisticated touches to create a nursery where both my child and I would enjoy spending time. Decorating with a mix of children’s and adults’ decor was an easy way to achieve this look; for example, a felted wool elephant head is framed by succulents in contemporary CB2 vases above the mantel.
Scavenge for One-of-a-Kind Pieces
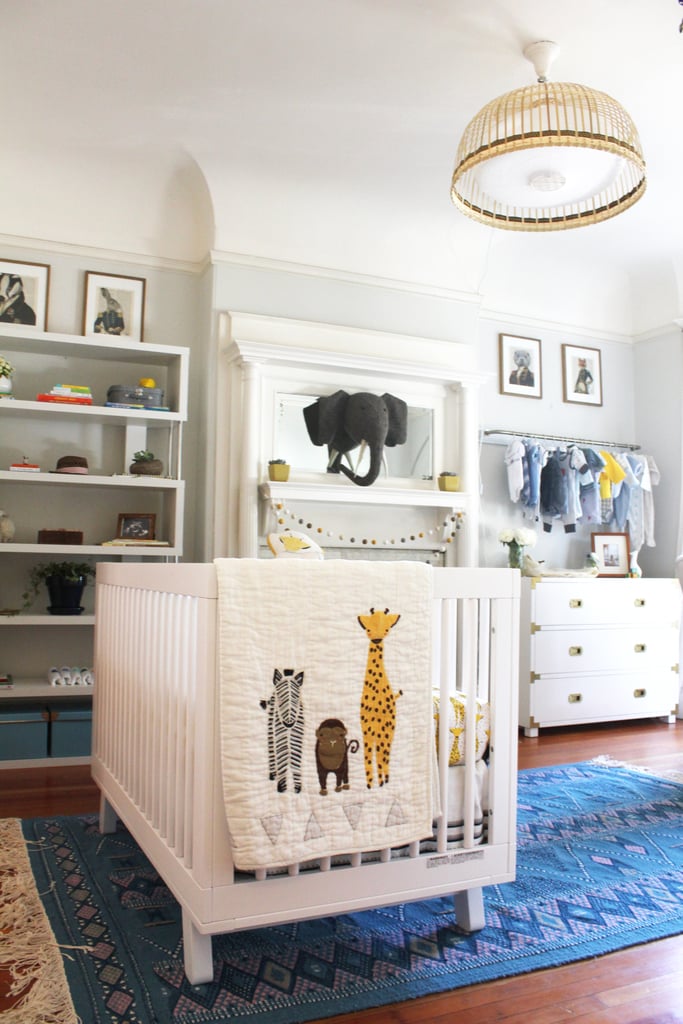 Image Source: POPSUGAR Photography / Lisette Mejia
While I love to browse through the beautiful nurseries in catalogs, I wanted my nursery to have a more unique and eclectic look, so I shopped for a mix of new, store-bought items, like the crib, and distinctive decor, like the blue Moroccan Kilim rug my Laurel & Wolf designer found from a Tunisian rug dealer on Etsy. It was the first piece I purchased for the room, and it set the whimsical tone for everything that came after.
Thoughtfully Lay Out the Room
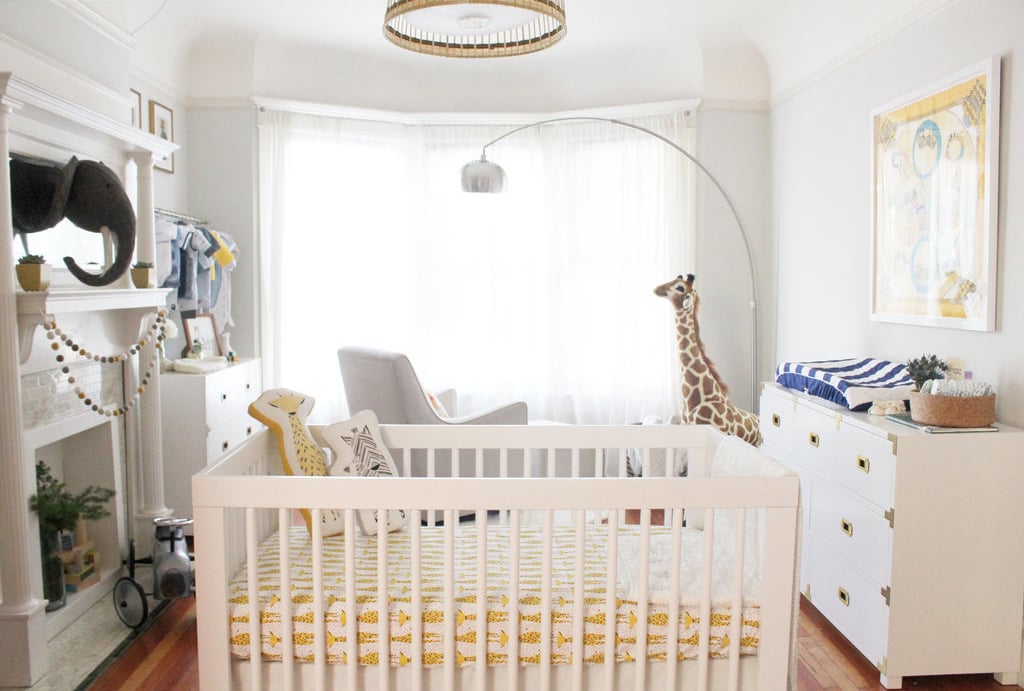 Image Source: POPSUGAR Photography / Lisette Mejia
Every space presents its own challenge, and my home’s was its outdated Victorian floor plan; fortunately, Pamela, my Laurel & Wolf designer, evaluated my needs and came up with a creative layout that allows the room to function as both a nursery and playroom. Using the measurements of the space and essential furniture pieces, she created a layout to scale on Laurel & Wolf’s platform, allowing her to play around with configurations. You can draw your own or check out one of the many websites and apps that allow you to do it on your computer or tablet.
Shop Second-Hand Finds
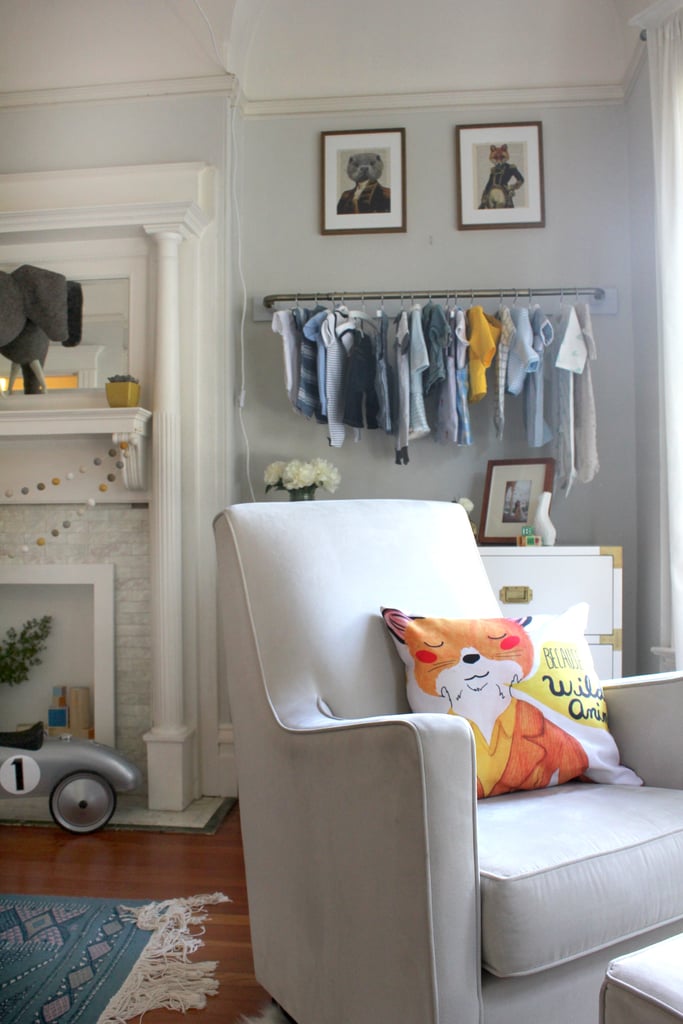 Image Source: POPSUGAR Photography / Lisette Mejia
I knew I wanted a high-quality glider, but every style I liked gave me a serious case of sticker shock. While the glider is an important piece of the nursery, it’s not one with versatility or longevity, so I didn’t want to splurge on it. Instead, I set up a Craigslist alert and pounced immediately when the high-end glider I loved popped up for sale in mint condition at nearly a third of the new price.
Splurge Where It Makes Sense
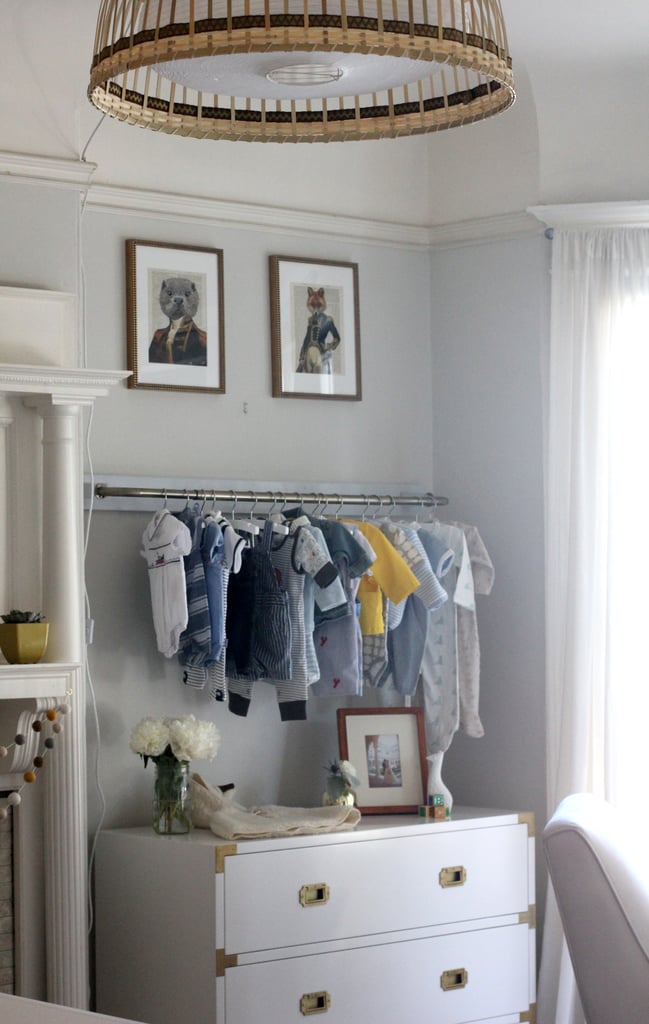 Image Source: POPSUGAR Photography / Lisette Mejia
As the nursery design process progressed, I fell hard for the timeless yet exotic look of campaign dressers.The initial plan was to purchase an affordable vintage set or DIY my way to the style, but ultimately I decided to splurge on Pottery Barn Kids’s Gemma dressers. Their aesthetic was perfect not only for a baby boy’s nursery, but could also fit seamlessly into a girl’s room, or our own bedroom down the road. The furniture pieces could eventually even be converted into a bar cart or sideboard. The quality, versatility, and storage potential of the campaign dressers made them a worthy splurge.
Get Family and Friends Involved
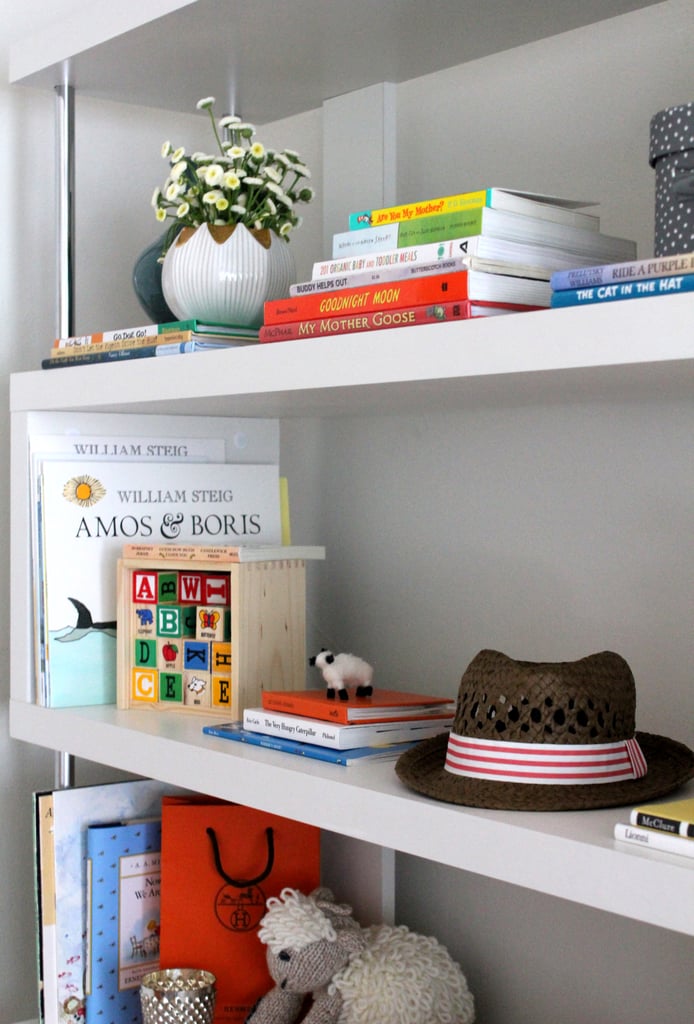 Image Source: POPSUGAR Photography / Lisette Mejia
Rooms decorated with love and care really do feel warmer and more welcoming. To bring all the love the baby’s family has for him into the space, his cousins filled the bookshelf with their favourite childhood reads. They even inscribed the inside cover of each book with a special message to the baby.
Seek Help For Design Dilemmas
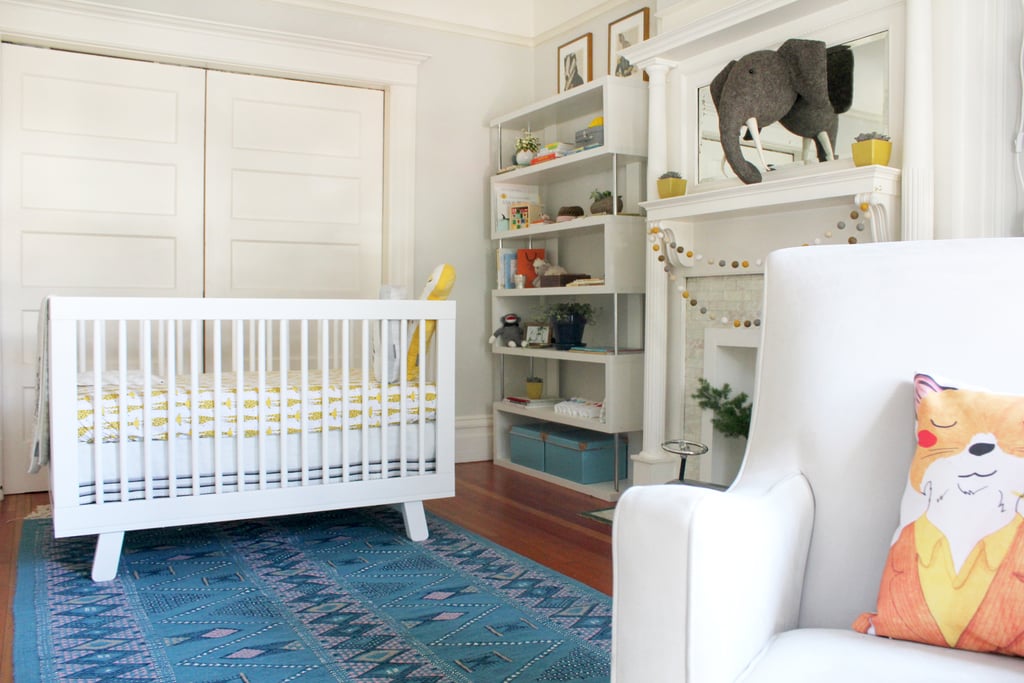 Image Source: POPSUGAR Photography / Lisette Mejia
Not sure how to solve that diaper storage problem or where to put the crib? Get help! Working with Laurel & Wolf gave me the pro insight I needed to really polish and refine my design concept. Whether a professional interior design service or a best friend with a great eye, it’s never a bad idea to get a fresh take on your space.
Turn Cute Baby Items Into Decor
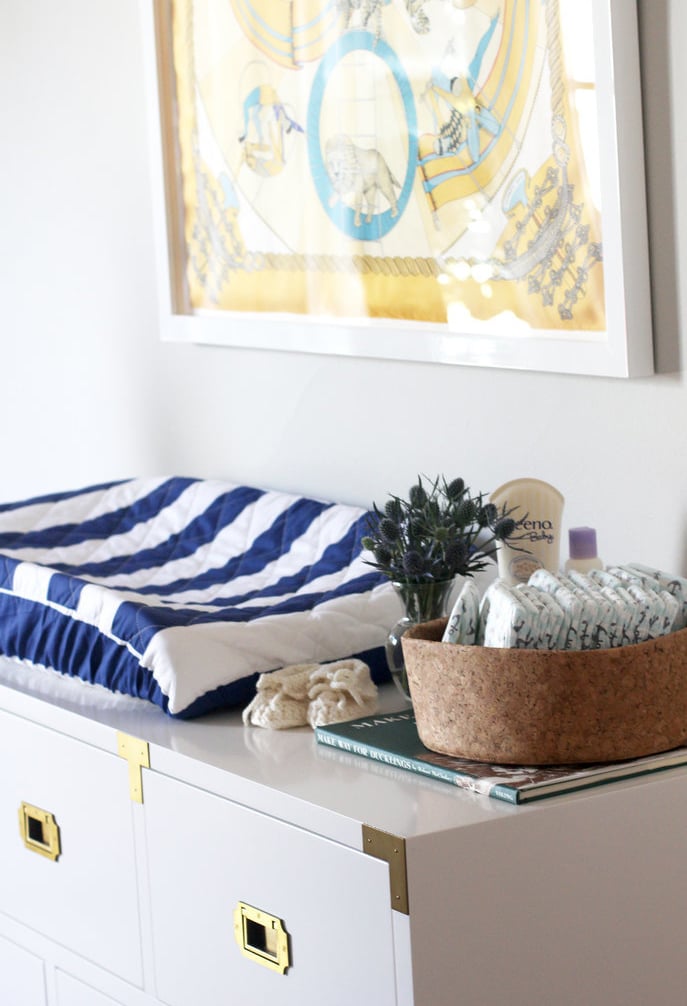 Image Source: POPSUGAR Photography / Lisette Mejia
If you’ve ever heard the ooing and ahhing that happens at baby showers, then you already know how adorable baby clothes and accessories are. Instead of hiding them in a drawer, I decoratively displayed a few of my favorite pieces, like these knitted booties grandma bought in Ireland, around the room.
Keep It Interesting by Mixing High and Low
 Image Source: POPSUGAR Photography / Lisette Mejia
Avoid a stale, straight-out-of-the-showroom look by mixing retailers, styles, and price points. From eBay to Land of Nod, I shopped a variety of sources to give the nursery rich, eclectic style and added flair through small, affordable items, like these playfully striped Ikea seagrass baskets and the fluffy faux fur accent rug.
Get Creative With Storage
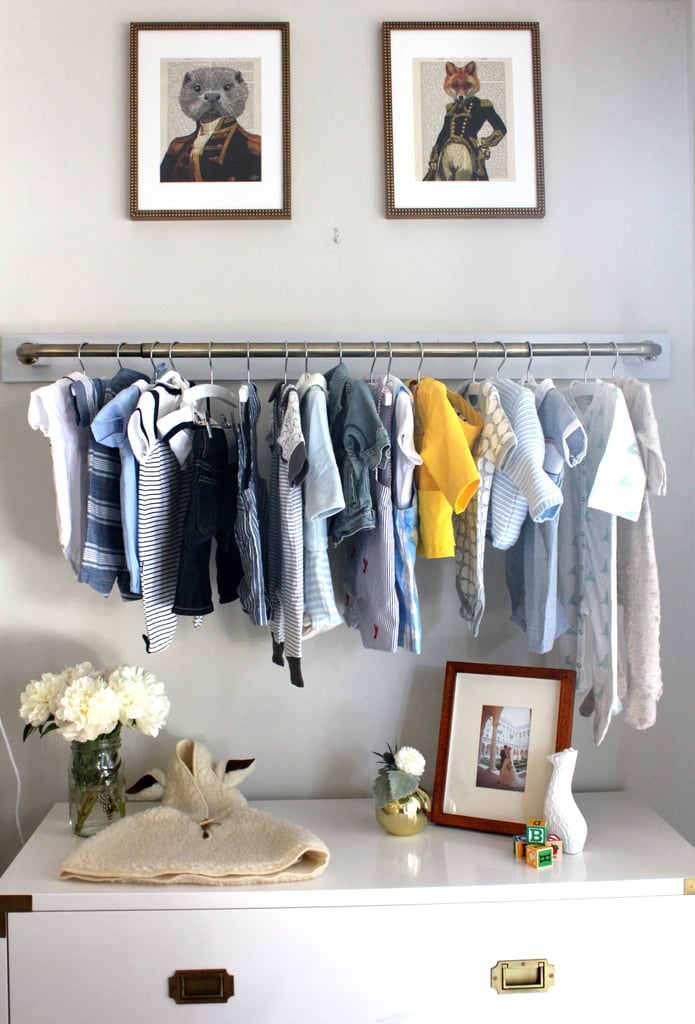 Image Source: POPSUGAR Photography / Lisette Mejia
The room we transformed into a nursery had no closet, but instead of dragging a heavy armoire into the space to store hanging clothes, I mounted a rod into the wall. It not only gave me a place to put all of baby’s hanging clothes, it also put some of his most adorable ensembles on display.
Take Your Time
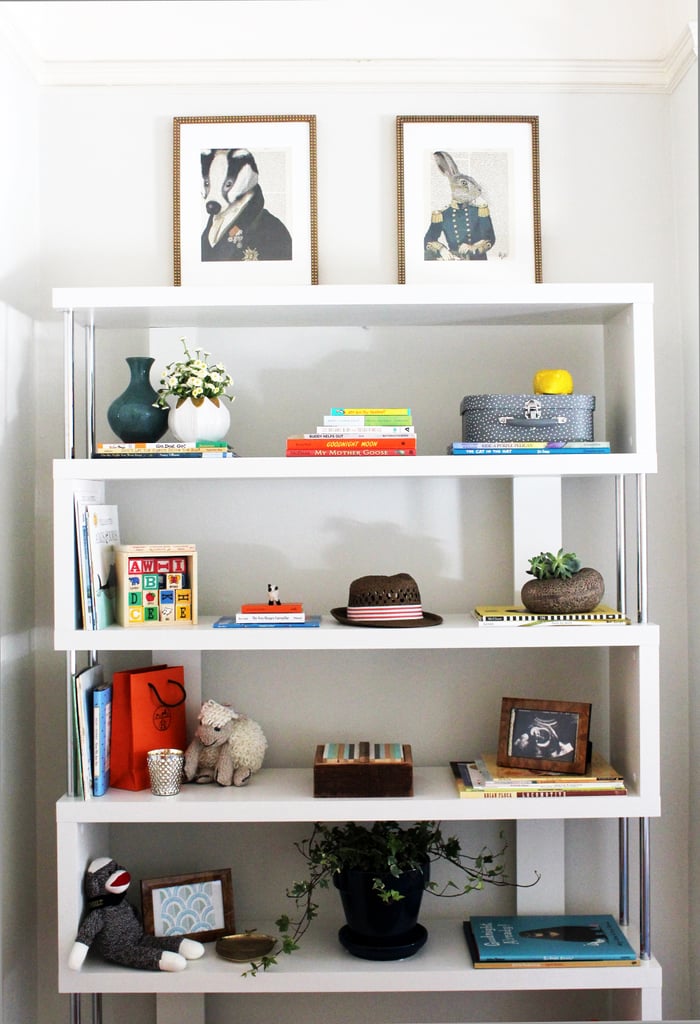 Image Source: POPSUGAR Photography / Lisette Mejia
Don’t rush to fill in every gap in the nursery at once. It’s OK if the bookshelf isn’t full or there’s a blank spot on the wall. Great design takes time, and there will be plenty of opportunity to fill the space with meaningful mementos after the baby is born. Trust me, you’ll be glad you waited and did it right the first time.
Comments (0)
18 July 2017
By portermathewsblog
July 14, 2017 6:00am
 Perth’s property market could be about to turn the corner, experts say.
WA PROPERTY markets could go from the nation’s worst to its best-performed over the next two years as buyers regain confidence in the State and go cold on the rest of the country.
National Australia Bank analysis suggests WA has reached the bottom after several years of falling property prices, growing rental vacancy rates and the biggest fall in rents since the early 1990s.
NAB chief economist Alan Oster said there were clear expectations among property analysts that the WA market would improve relative to the rest of the country over the next two years.
“In WA, where the local housing market has under-performed relative to the Eastern States after the mining investment slowdown, house prices are expected to rebound and grow 1.3 per cent,” he said.
Experts surveyed by NAB believe Armadale, Bentley, central Perth and Scarborough look the best prospects in the city.
Sydney and Melbourne have seen double-digit price increases in the past two years but the NAB survey believes these two will slow down.
Victoria’s market is tipped to be the weakest within two years, with WA vying with Queensland for top spot.
The improvement in the WA market is tied to a lift in the jobs market.
The survey found employment security was the single largest impediment for buyers of existing property in WA but, with signs the jobs market has bottomed and may be improving, this is tipped to be less of a negative in the next two years.
Mark Passmore, of Passmore Real Estate in Morley, said there had been a noticeable lift at the higher end of the market, which was a sign the entire market was shifting.
He said interest was growing in sought-after suburbs where prices had dropped over recent years as confidence in the overall market and economy had improved.
“You can feel that the market is at a pivotal point,” Mr Passmore said.
He said a drop in the price of land had brought developers back into the market while more varied selling methods, such as auctions, were being used to get buyers back.
Comments (0)
13 July 2017
By portermathewsblog
via domain.com.au
Any painter knows good groundwork and the right equipment are the secret to successful paint jobs. After filling, sanding and cleaning, pause before flipping open a fresh can of paint and loading up a brush or roller. What you use to apply that gorgeous new colour makes the difference between a first-rate finish and one that screams bad DIY.
Take these tips for brushing up on your painting know-how.
Start squeaky clean
Using brushes with stiff, shaggy-dog bristles clogged with remnants of a previous colour, rather than buying a new tool for the job, is a false economy. Clean them up before you start, or invest in new brushes.
Resurrect synthetic brushes caked with water-based paint by soaking in very hot water with a little detergent. Rinse well, reshape by hand, wrap bristles in kitchen paper and hang to dry. Follow clean-up directions for brushes previously used with oil-based paints. Brush combs for removing paint residue and realigning bristles are sold at paint stores.

Photo by Paint & Brush – Search nightstands
Size up the job
Are you tackling a bedroom wall, a narrow trim, an entire room, or just touching up a shabby cabinet? Let the area to be painted guide you to the best brush width.
- Narrow frames and mouldings: 25-38 millimetres
- Doors, railings, cabinets, gutters, eaves: 50-63 millimetres
- Floorboards, skirtings, fascias: 75 millimetres
- Large, flat areas such as walls: 100+ millimetres, usually called “wall” brushes.
Tip: If you’re new to painting or have small hands, an 88-100 millimetre brush on a large wall may tire your wrist and arm. Go for a brush around 75 millimetres.
Pick a bristle
DIYers often ask whether natural or synthetic bristles work best:
Natural bristle brushes, mostly hog, ox or badger, are typically more expensive than synthetic ones and are used for oil-based paints, varnishes and shellacs. Don’t use for water-based (latex) paints, as they absorb water from the paint, softening and changing shape. This also affects the composition of the paint and may cause “tramlines”.
Comments (0)