29 July 2020
By portermathewsblog
23 July 2020
from reiwa.com.au

With the recent building grants announced by the State and Federal Government, you might be feeling inspired to build your dream home instead of buying an established property.
If you are one of those people who took the plunge and bought a block of land, or maybe your bathroom just needs a facelift, then it’s time to start thinking about what the perfect bathroom means for you.
We spoke with senior building designer for Summit Renovations, Ashley Tunley about the bathroom design trends that have gained momentum in 2020.
“Bathrooms remain one of the most popular rooms in an Australian home to renovate. We spend so much time in them, so it’s important to make sure the design and layout works for everyone in the family,” Mr Tunley said.
Top emerging bathroom trends
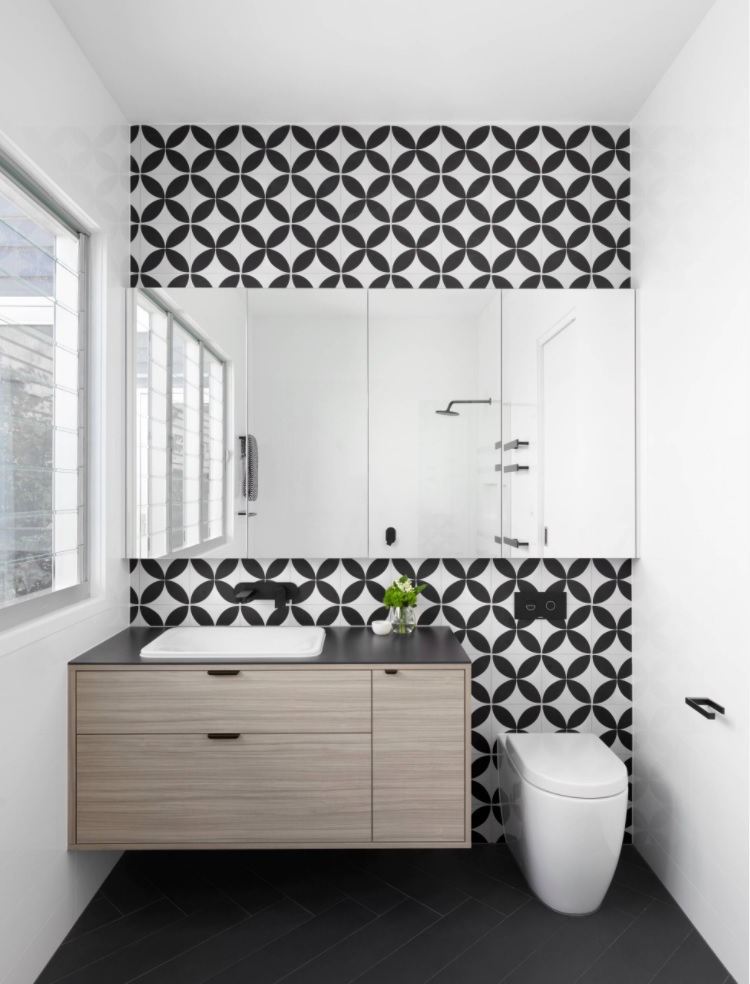
Pop of colour
Don’t be afraid to inject a little colour and fun into your bathroom.
The perfect addition to a neutral bathroom is an unexpected pop of colour which will create a focal point, either with your tiles, basins or hardware – the choice is yours!

Tapware
Brushed tapware seems to be increasing popular. Wall mixers and wall mounted tapware in this finish really stands out against the splashback.
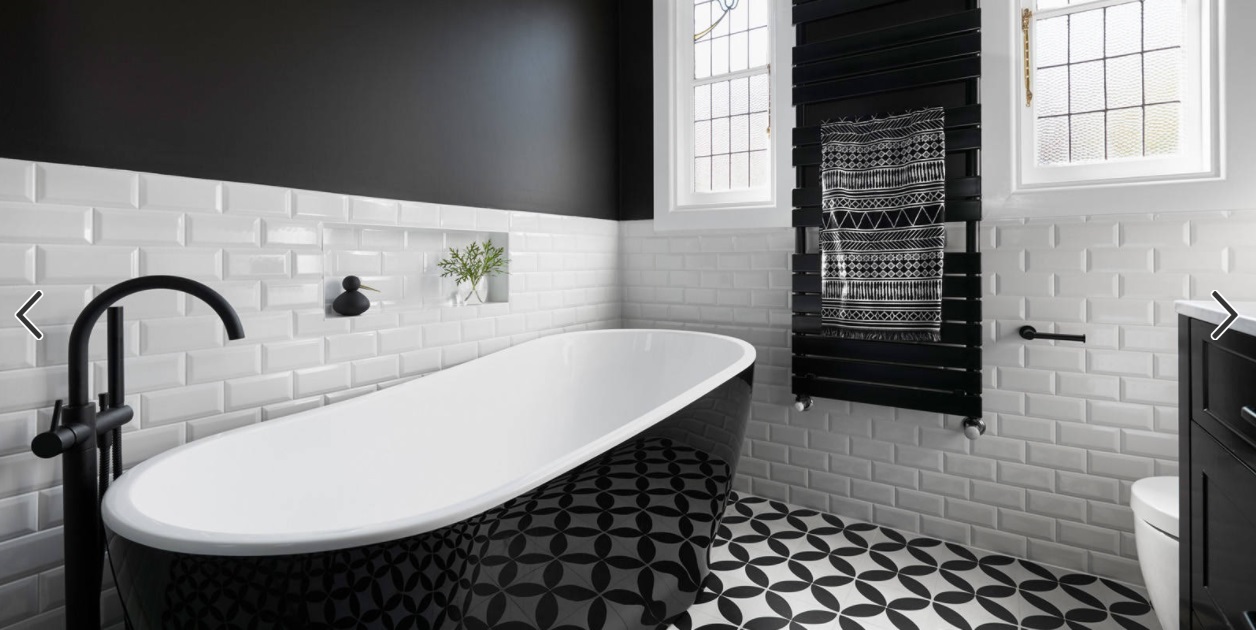
One trend we’re seeing no signs of slowing down is the use of black tapware, which continues to gain momentum when it comes to bathroom renovations.
Freestanding baths
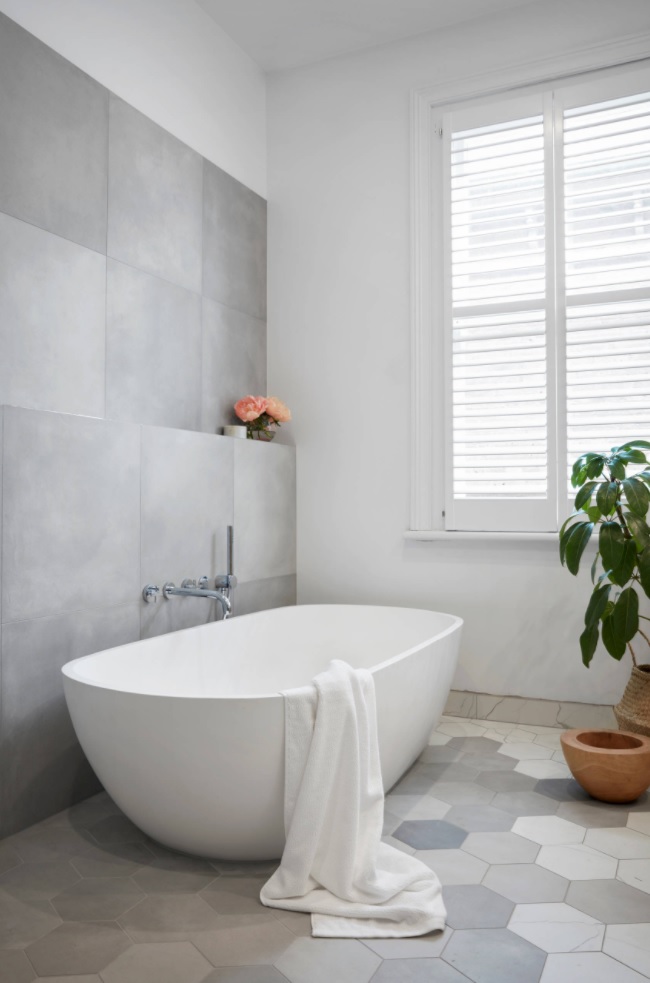
Freestanding baths instantly turn your bathroom into a resort-style sanctuary and are very popular amongst those renovating when adequate space is available.
With many different styles and sizes from oval or rectangle to D-shape and round, there’s plenty of options to choose from.
.jpg "summit_bathroom_reno") A bathroom built by Summit Renovations
A bathroom built by Summit Renovations
Walk-in showers
A walk-in shower provides a contemporary finish and with no door or minimal glass – it really is a showstopper when it comes to a bathroom renovation.
Not only is a walk-in shower safer for children and the elderly, it’s also much easier to clean. With fewer nooks and crannies, that means less dirt and mould that can accumulate.
It also allows for a shower with a floor-to-ceiling design which gives you more options for where you place the shower heads and tapware.
 A walk-in-shower by Summit Renovations
What about materials and textures?
Use quality, natural materials for surfaces such as stone benchtops which remain a popular choice in the bathroom due its durability.
Textured wall tiles are a popular choice as not only do they add personality and life to a bathroom, but they also prevent condensation forming on your walls.
When it comes to your bathroom vanity, a great way to add texture and warmth is by adding feature timber laminate. This continues to be a popular material due to its variation in colours and tones and it offers a timeless look.
According to Mr Tunley, there is no such thing as a one-size-fits-all bathroom solution.
“If the design of your bathroom is carefully considered, there’s nothing stopping you from having the bathroom of your dreams,” he said.
Before you breathe life into your new bathroom, make sure you’ve read our ten tips for renovating your bathroom.
Comments (0)
23 April 2018
By portermathewsblog
via domain.com.au
When was the last time you ventured to the very back of your bathroom cupboards? Here are some tips to declutter and organise this area to save you time (and money).

Photo by Dulux Paint
Whether you’ve been living in your home for 15 years or 15 weeks, a bathroom declutter will save you time getting ready in the morning. Plus, you’ll be surprised by how much accumulated clutter you can easily let go of, giving you much more open space.
1. Empty out
First, grab a rubbish bag for anything that needs to go directly into the bin. Ensure some wipes are nearby to clean the cupboards and drawers down once everything is out. Then create space on the floor or benchtop where you can sort things. I usually use the floor, as you can empty every single item out of the bathroom cupboards, drawers, shelves and off the vanity top and lay them out so you can see what you have.
While the cupboards are empty, take the opportunity to give them a wipe out, as bathroom cupboards often end up covered in product, dust and hair. No doubt you’ll find some lonely hair clips living at the back of the bathroom cupboard too.

Photo by Zeitgeist Photography
2. Dump expired products
Once you have everything on the floor, the next step is to throw out any expired products. In almost every bathroom there are products that have expired (sometimes ones that are decades old) that need to be thrown away. Grab your rubbish bag and you’ll be surprised how many items end up in it.
Remember that you put these products on your skin, hair and nails, and you don’t want to absorb out-of-date chemicals into your body. If you can’t remember when you purchased it, the chances are it’s time to discard.
This is also a good time to dispose of products that you keep thinking you’re going to use, but probably never will. Orange nail polish? Out. Purple eye shadow? Out. Self-waxing kits? Unless you’ve used them in the last six months, say bye bye.

Photo by Capital Closets
3. Categories and containers
My key organisational advice for bathroom cupboards is to use storage baskets inside the cupboards or drawers, so that you both contain categories and are able to access items quickly and easily. The following categories are common to almost every bathroom I’ve ever helped declutter and organise:
- Make-up
- Hair products
- Sunscreen
- Tanning sprays and lotions
- Moisturiser
- Basic first aid
- Sanitary products
- Shaving
- Nail polish
- Eye care
- Medications
- Perfumes
I suggest using baskets with handles to make accessing things at the back of the cupboard easier. This way you don’t have dead space at the back where products fall out of sight and out of mind. Use either a black marker or label maker to label the containers, so you can quickly and easily see what is there. You can then put things away quickly, without having to pull each basket out first.
One added advantage of having products stored like-with-like is that when you want to paint your nails, for example, instead of rummaging through a drawer trying to find the polish, file and top coat you can quickly and easily grab the basket where everything is kept.
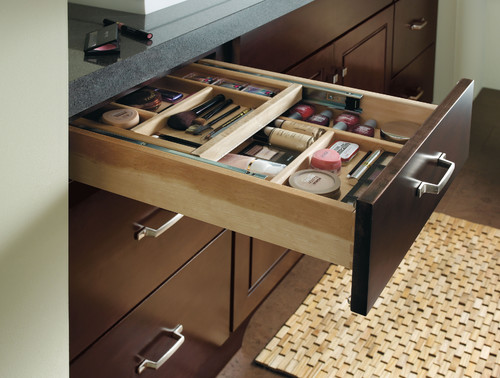
Photo by MasterBrand Cabinets, Inc.
If you have a large make-up collection, it’s even more helpful to further categorise the contents into different types of products. You might like to have smaller containers, keeping lip colours, eye products, foundations and blushes separate. This will also help you know what products you have, and will save you money. When you run out of one eye liner, you can quickly and easily find another one that you already own instead of buying a replacement.

Photo by Dettling-Architekten
4. Use it
Now that you know what you have, a useful tip is to use the products you already own rather than buying new products. Use the sunscreen you have before you buy any extra. Finish the hand cream you have before you trying a new product. Rediscover lipstick colours you forgot you owned. Your wallet will thank you for it.
You may also rediscover forgotten products that inspire you; think massage oil, a pedicure set, bubble bath or hair treatments. Take some time out one night to pamper yourself a little bit… it can be your reward for doing a great job of decluttering your bathroom cupboards.
Comments (0)
25 January 2018
By portermathewsblog
via houzz.com.au
Welcome to our new series, ‘3 Things I Wish My Clients Knew’, where we’ll be asking a range of experts in the design world to reveal three things they wish every client understood, whether it’s answers to questions they’re commonly asked, practical considerations that would speed up the design and installation process, or knowledge gaps they’d love us to fill… plus a useful golden nugget for you to store away in your memory bank.
We kick off with interior designer Stephanie O’Donohue from smarterBATHROOMS+, who talks us through the things she wishes every client knew before starting a new bathroom.
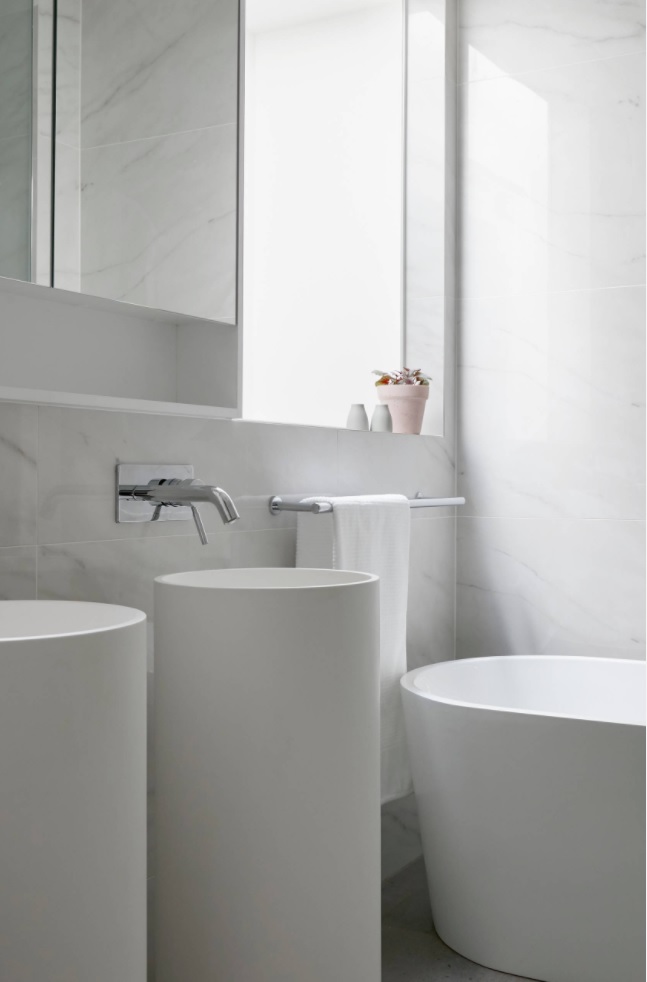
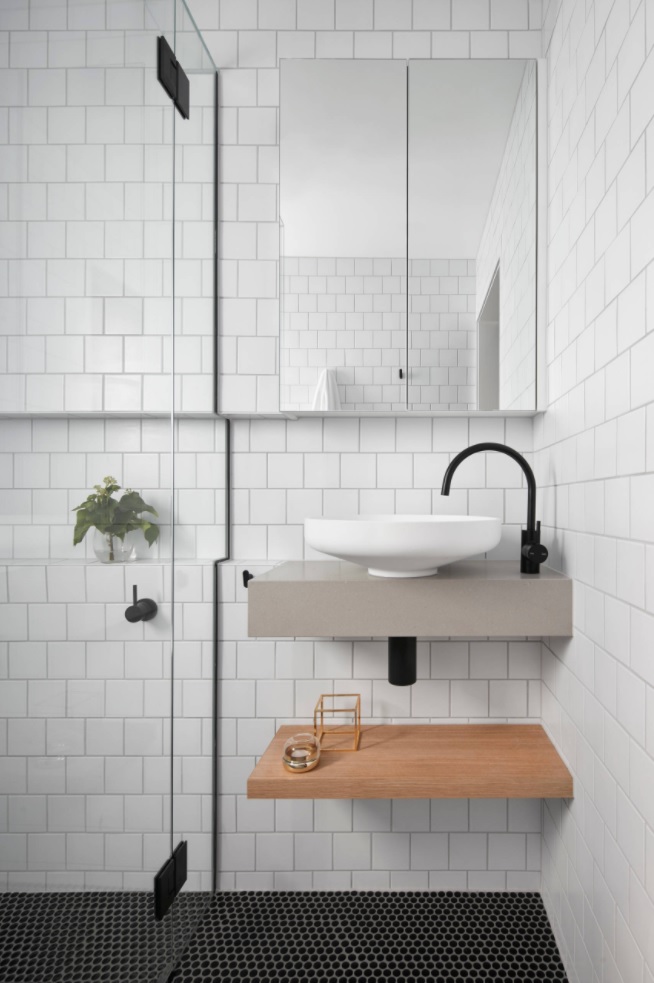
1. Minimalism is (almost) never cheap
‘Clean, sleek lines’ is what my clients ask for – think single sheets of material, no joins, no handles and no grout lines. The most common misconception I come across is that this is a cheap look to achieve. People are fooled by the apparent simplicity of the aesthetic. But to achieve a truly beautiful, minimalist look the detail in the build needs to be precise.
Some of the simplest-looking spaces I have worked on have been the most expensive, due to the immense detail and meticulous planning required.
Specifying no cabinetry handles often means expensive opening mechanisms or hand-cut joinery. No joins in stone means buying oversized slabs and having an expert stonemason on hand to book-match the ends perfectly. And no grout lines means either huge, expensive tiles that take two tilers to lay (which doubles the labour cost) or porcelain sheets that can only be cut and installed by a stonemason – onto a wall that most likely has to be straightened instead of just packed.
2. Don’t DIY your tiling – ever
It’s just not worth it. Planning the tiling and tiling itself are both art forms. I have seen far too many new bathrooms that only look good when you’re not wearing your glasses. Once you see a crooked tile or uneven grouting it cannot be unseen.
A tiler who plans the space, tile by tile, to ensure the placement of cuts and grout lines will be perfect is worth their weight in gold. You may be tempted to tackle a job that seems straightforward, but don’t do it. Especially if you have contrasting grout.
A good tiler will work more quickly than you could ever hope to, and they will be able to correctly use epoxy grout, giving you a superior and longer-lasting finish than you’d achieve yourself with a regular cement-based grout. They will also be able to disguise an uneven wall or an unsightly edge to a degree.
The tiles and grout are your first defence against water damage. Inferior tiling puts your whole room and subfloor at risk. Step away from the tiles and call an expert.
 3. Tight budget? Stuck for a design idea? Go big!
This is one of my favourite tricks. Sometimes you can’t afford the Rolls Royce of every element in your space. But if you can distract from your more economical, practical design decisions with a wow feature, you can save yourself thousands in upgrading everything unnecessarily.
Oversized handles, for example, can add a touch of drama and interest to an otherwise plain bathroom. Have you got a high bathroom ceiling? Find the biggest pendant light your electrician can lift and fill the bathroom with an object so demanding of attention that it develops a personality of its own. You’ll find it gives your bathroom a real designer edge and detracts from the cheaper elements in the space.

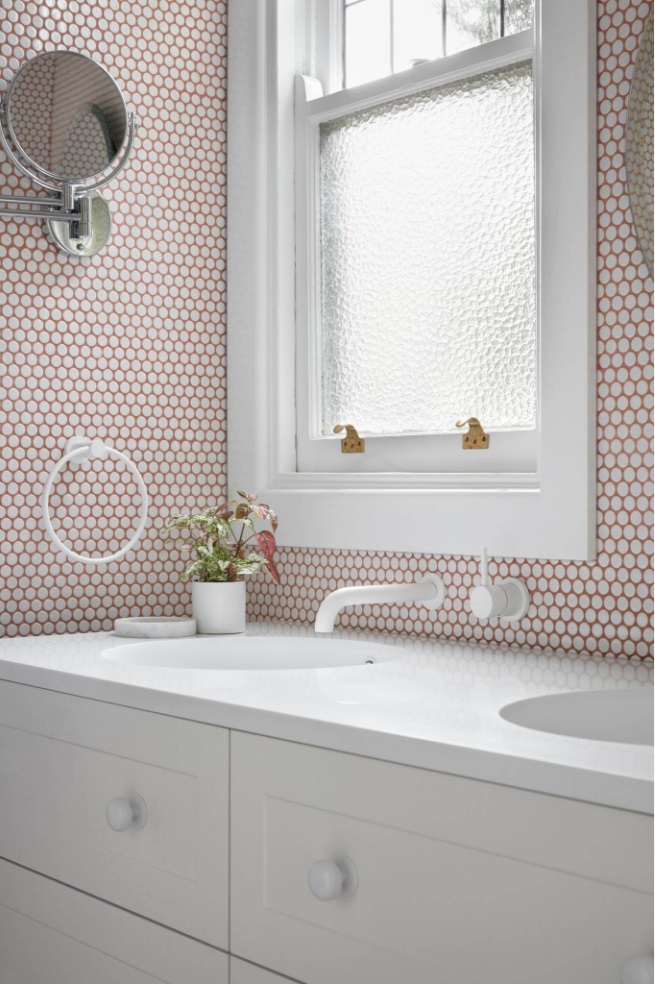
You could also distract the eye with repetition, where you take one design idea and use it several times over in a space. Do you love penny round tiles? Pick a round basin, rounded tapware, a round mirror and towels with a circular pattern. Repetition of a theme will give the space a cohesive, thought-out feel where every design decision is deliberate.
It will also help you shop better as you won’t fall into the trap of picking 10 things you love and finding none of them work together.
 The one thing I always get asked is…
‘How long does a bathroom renovation take?’ Many people are surprised when they hear that a quality bathroom renovation takes about four weeks. Renovation shows are not reality!
Many people don’t have a spare bathroom they can use while the renovation takes place. If that’s the case for you, plan ahead. Hire a portable toilet or shower from a reputable builder, join a nearby gym (there are often free trials you can take advantage of), or consider renting elsewhere for a month while the job is done.None of these are ideal, but if you’re going to build a bathroom to last 20-30 years, that month of inconvenience will quickly be forgotten when you step inside your gorgeous new space.
My golden nugget…
Unless it’s a colour other than chrome, a tap is a tap. Something basic will be fine, so don’t spend your hard-earned cash there. Funnel your money into custom cabinetry instead. Having a smart drawer that fits your lipstick collection perfectly, in a colour you love and with a concealed bin, will be worth so much more than the bragging rights for Italian taps.
Comments (0)
02 November 2017
By portermathewsblog
When Brooklyn-based radio producer Miki decided to treat herself to her dream bathroom, she called on Homepolish, an interior design start-up that only charges a flat hourly fee, to take her to the promise land. Let’s just say that Homepolish delivered.
To modernise Miki’s outdated bathroom without losing its pre-war charm, Homepolish interior designer Sandie Tsai chose a black, white, and grey palette accented with pops of brass. While it’s not the largest bathroom, you hardly notice thanks to the luxe materials and strategic design decisions.
Keep reading for the full tour and Sandy’s smart renovation tips!
Photo by Samantha Goh via Homepolish
While brass details pair well with black and white, Sandie was careful not to over-do it. To keep it tasteful, she balanced the flashy brass with more subdued oil-rubbed fixtures on the sink.
Photo by Samantha Goh via Homepolish
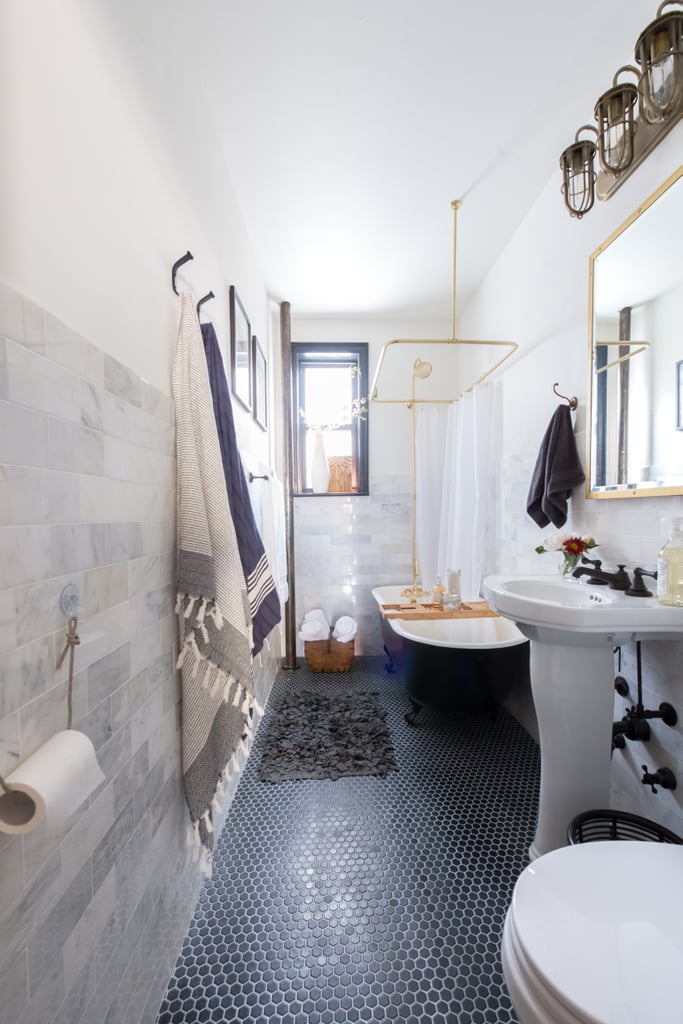 Limiting the palette to two or three colours and playing with texture helped make the small bathroom appear to be much larger. Marble subway tiles on the wall and black tiles with light grouting on the floor add subtle pattern and richness.
Photo by Samantha Goh via Homepolish
Hot tip: using elevating pieces like the clawfoot tub also gives the illusion of added space.
Photo by Samantha Goh via Homepolish
The glamorous brass hardware allows for the best of both worlds — a soaking tub that can also work for quick showers.
Photo by Samantha Goh via Homepolish
Painting the small window frame black also helps draw the eye up toward the ceiling.
A bath tray makes it easy to keep products (or even a good read) dry and at the ready during bath time.
Photo by Samantha Goh via Homepolish
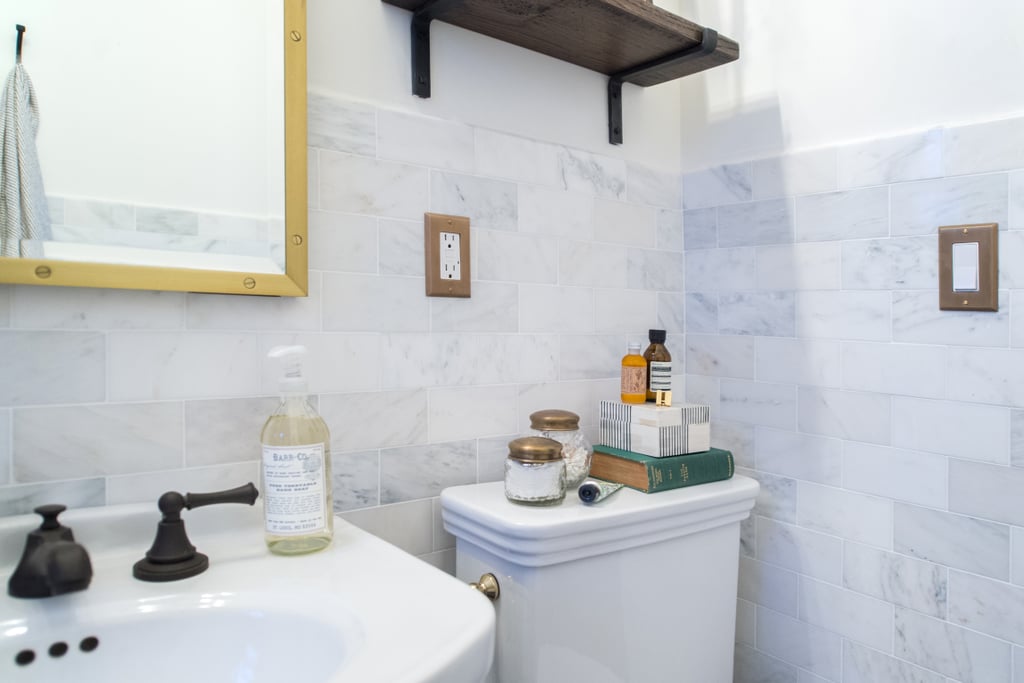 Another perk of a small bathroom? It’s much more affordable to indulge in luxurious materials, like marble subway tile for the walls!
Photo by Samantha Goh via Homepolish
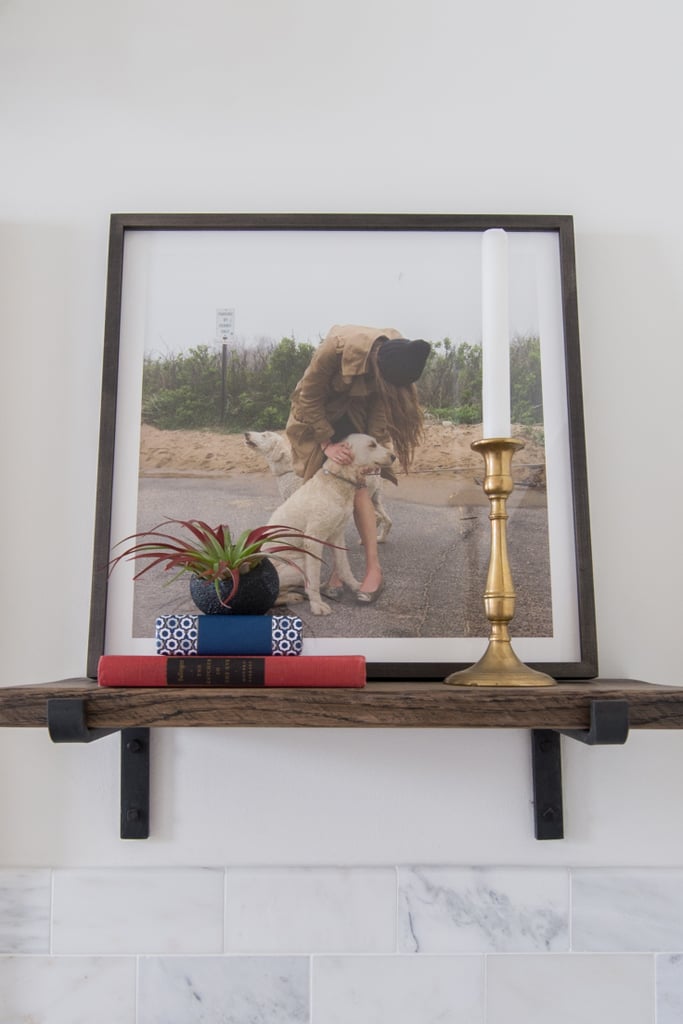 A small floating shelf makes it easy to create beautiful and meaningful vignettes, something that can add loads of personality to a bathroom space.
Photo by Samantha Goh via Homepolish
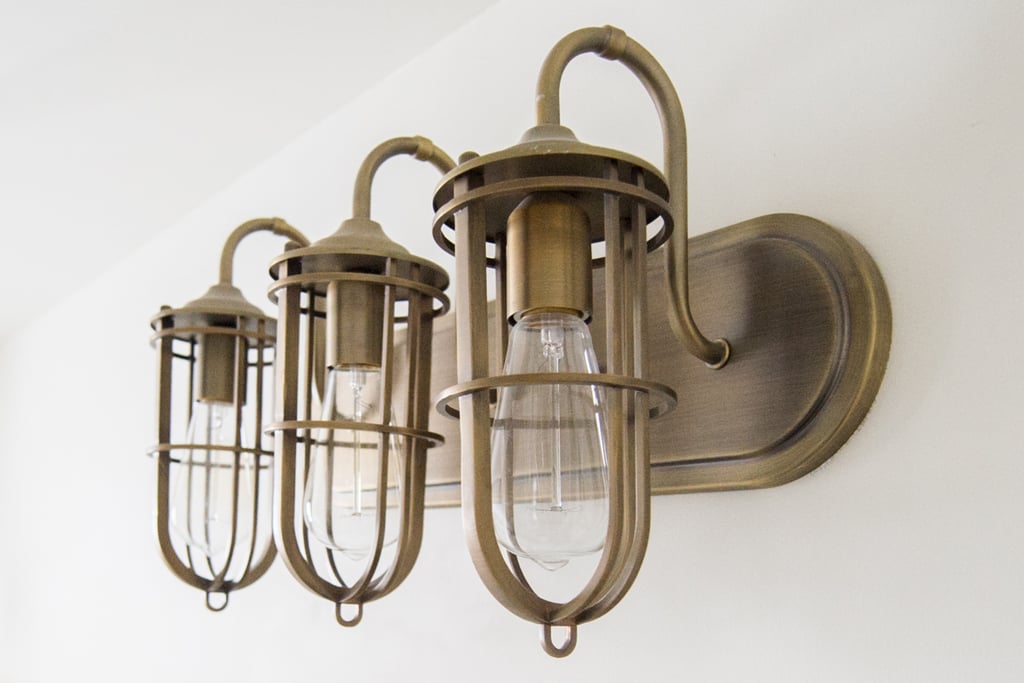 We can’t help but gush over these nautical-inspired sconces.
Photo by Samantha Goh via Homepolish
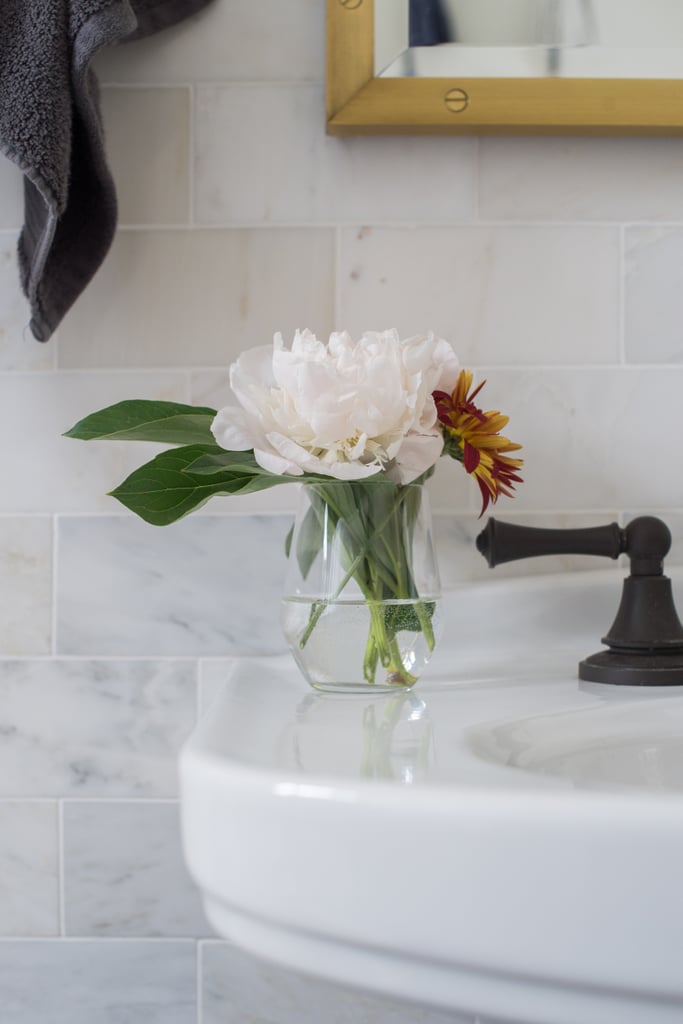 A bud vase on the sink kicks the glam factor up a notch.
Photo by Samantha Goh via Homepolish
 Two whimsical art prints hang above the tiled portion of the wall.
Photo by Samantha Goh via Homepolish
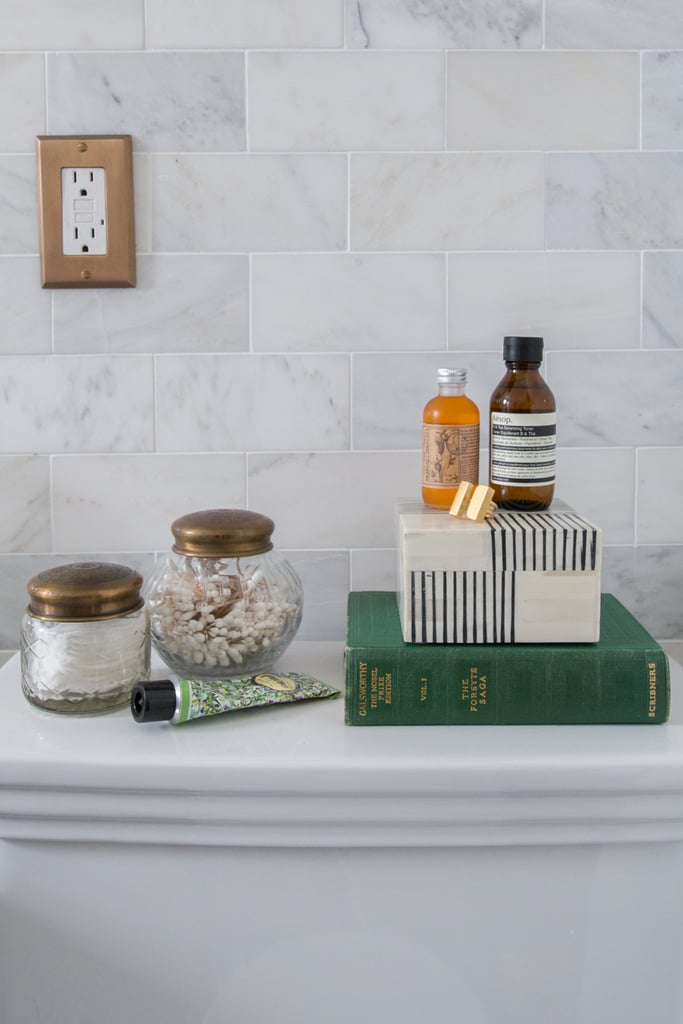 Why not take advantage of the space above the toilet? Sandie styled it with jars filled with Q-tips and cotton pads, bath products, a reading book, and a chic trinket box.
Photo by Samantha Goh via Homepolish
Comments (0)
25 May 2017
By portermathewsblog
via domain.com.au
The bathroom is one of the most expensive rooms to remodel. So if you’re on a budget, a bathroom renovation might be out of reach. The good news is you don’t have to live with the ugly – all you need is a little DIY elbow grease.
Try these easy projects to give your bathroom an upgrade, and the best part is, you can do any of these in one weekend.
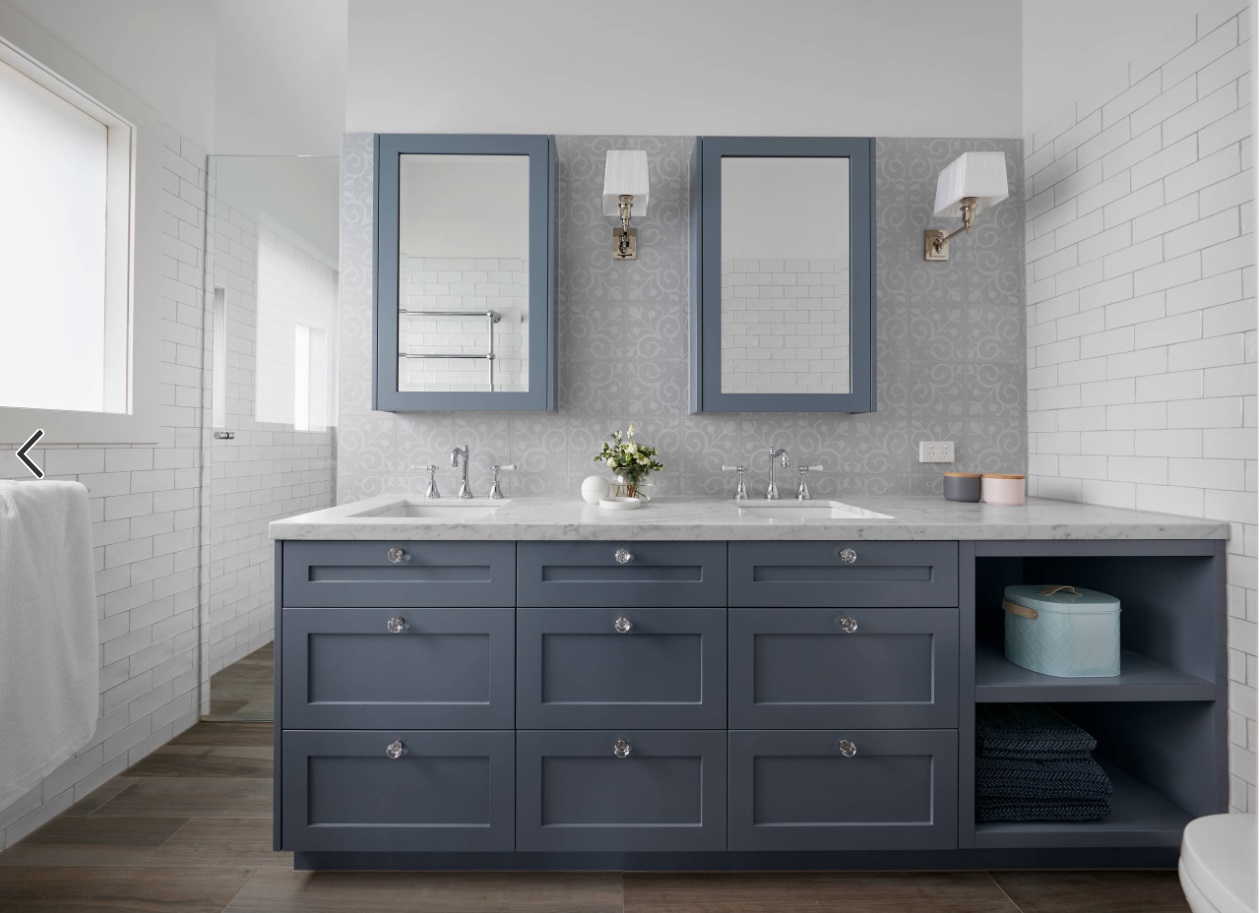
Update the vanity
 Transform the vanity with new paint and hardware. Photo: Jason Frank Rothenberg / Domino
Painting the vanity is one of the cheapest ways to upgrade your bathroom and still make a big impact. Sand your existing vanity, and patch any imperfections with wood putty. Then, start with a good oil-based bonding primer before applying the final coats of paint. Finish the look with new hardware
Upgrade the toilet lever
Photo: The Makerista
Something as small as the flusher handle can make a big difference. Upgrade the white plastic version for something in shiny chrome. Don’t be intimidated by the plumbing aspect of this project; it’s actually super easy.
Replace the towel bar with hooks
Photo: House Tweaking
Using hooks in place of a towel bar is not only more stylish but also easier to use. You don’t have to worry about perfectly folded towels hung evenly on a bar.
Add a bold accent wall
Photo: Jessica Antola for Domino
Another way to add a wow factor to your bathroom is to go bold with paint. Choose one wall and go wild with a colour you might be scared to use anywhere else.
Paint your own wallpaper
Photo: May Richer Fuller Be
Wallpaper can be pricey, so why not paint your own pattern? You don’t have to be an artist to get beautiful results. Use a stencil, or go freehand like this project from May Richer Fuller Be. She created a stunning basket-weave pattern with simple brushstrokes.
Change the light fixture
 Photo: A Beautiful Mess
Changing the light fixture in your bathroom can actually be easier and more affordable than you think. Use an inexpensive LED light, then amp up the style by using a decorative ceiling medallion.
Line the medicine cabinet with decorative paper
Photo: Sarah Hearts
The medicine cabinet can be a neglected space, full of dusty shelves and expired products. Sprucing it up is the perfect weekend project. Get it organised, and then add a bit of flair with decorative contact paper. It’s a nice little surprise every time you reach for the toothpaste.
Add art work with a photo collage
Photo: Little Green Notebook
Every room needs art work, and the bathroom is no exception. Make a collage with your favourite photos by mounting them on fabric-covered cardboard and plopping it in a frame.
– popsugar.com.au
Comments (0)